- Links
100% right
This is an old revision of the document!
Main author:
    Daniel-Constantin Mierla <miconda [at] gmail.com>
      - founder Kamailio SIP Server project
By using open source and open standards you can build your own Skype-like service pretty easy. With this tutorial I am showing how to do it by using SIP (Session Initiation Protocol) - well known open standard protocol in Voice over IP world - by running Kamailio SIP server in the role of “Skype authentication server and super-node” and Jitsi in the role of “Skype client-side application”.
Both Kamailio and Jitsi are free and open source applications. Kamailio SIP server is developed to run on Linux/Unix servers and Jitsi is a cross platform application running on Linux, Mac OS X and Windows.
To complete properly this tutorial, you must have:
Instead of a physical server, you can use virtual machine running Debian (Ubuntu, a.s.o.), one very good option, free and open source, is VirtualBox. You can download some pre-made VirtualBox images for several Linux distributions from here.
Not all Skype features can be fully available with this setup, the focus being on the most famous and free-of-charge:
This tutorial includes examples and screenshots taken with three users: alice, daniel and john.
Kamailio is an open source SIP server implementation, developed since 2001. The project offers repositories for several Debian and Ubuntu distributions, making installation straightforward on Squeeze.
If you prefer a different Linux distribution, check next web pages for alternative packages:
To install Kamailio on Debian Squeeze, follow next instructions:
wget http://deb.kamailio.org/kamailiodebkey.gpg
apt-key add kamailiodebkey.gpg
Add the links to Kamailio apt repositories to /etc/apt/sources.list.d/kamailio.list (create the file with the content below):
deb http://deb.kamailio.org/kamailio31-nightly squeeze main
The latest stable version at this time for Kamailio is 3.1.x and the apt repository is set to fetch the nightly builds of the stable branch.
Install following packages:
apt-get install kamailio kamailio-mysql-modules kamailio-tls-modules
The list of the users and their passwords are stored in a local instance of MySQL server, to install it, run:
apt-get install mysql-server
You may be asked to provide a password for user root of MySQL server. Choose one and be sure you don't forget it.
Since you may connect to Super-Node from behind a home router, it is good to enable NAT traversal. For that, another application has to be installed:
apt-get install rtpproxy
Before running Kamailio, you have to adjust its configuration and add users in the network.
First edit file /etc/default/kamailio file and set:
RUN_KAMAILIO=yes
Download kamailio configuration files from:
Copy downloaded files in folder /etc/kamailio/. For example, if you have wget installed, run following commands:
wget http://kb.asipto.com/images/kamailio-jitsi/kamailio.cfg
wget http://kb.asipto.com/images/kamailio-jitsi/tls.cfg
mv kamailio.cfg /etc/kamailio/
mv tls.cfg /etc/kamailio/
Shortly, the changes done to downloaded kamailio.cfg file comparing with the default one 9the ones coming in the .deb package) are:
SIP_DOMAIN=_your_server_ip_or_hostname_
DBENGINE=MYSQL
My server IP used for this tutorial is 192.168.178.33, so the changes in /etc/kamailio/kamctlrc were:
SIP_DOMAIN=192.168.178.33
DBENGINE=MYSQL
kamdbctl create
You will be prompted for password of user root for MySQL server. Create all tables by entering 'y' to the options. Note that two MySQl accounts are created:
These users have access only from localhost, they can be changed in /etc/kamailio/kamctlrc before running 'kamdbctl create' (if you change thier values, then update file /etc/kamailio/kamailio.cfg accordingly)
kamctl add userid password
For example, adding user 'daniel' with password '1234qwet':
kamctl add daniel 1234qwet
In Skype, the client application is able to create new accounts, which is not possible in SIP with Jitsi application, therefore the user IDs have to be created manually on server with kamctl tool. Alternative, you can install Siremis and use it - this is a web-GUI management system for Kamailio.
You can add as many users as you want, change their passwords or delete them with kamctl tool.
Starting Kamailio is done via:
/etc/init.d/kamailio start
If you need to restart Kamailio at any time, just use:
/etc/init.d/kamailio restart
To be sure kamailio is running, run:
ps -fC kamailio
In case you have to go through home routers, be sure rtpproxy is running:
ps -fC rttproxy
Starting/stopping rtpproxy can be done with following commands:
/etc/init.d/rtpproxy start
/etc/init.d/rtpproxy stop
/etc/init.d/rtpproxy restart
Here are several handy commands to use when kamailio is running:
# list kamailio processes
kamctl ps

# show online users
kamctl ul show

# show internal statistics
kamctl fifo get_statistics all
Kamailio is shipped with self-signed TLS certificates – these are used to encrypt the communication. It may cause a warning message to be displayed by SIP client applications when they connect first time to Kamailio SIP server.
In case you feel more confident, then you can generate your own self-signed certificates using tools from openssl toolkit package and replace those stored in /etc/kamailio/.
To avoid the warning, you can purchase TLS certificates from a trusted authority, such as Verisign.
Jitsi is cross platform SIP capable application, very rich in features, supporting also what we need here for our Skype-like service:
Download Jitsi for your preferred operating system from:
Installation is specific for Operating System, but there are lot of pre-build packages, making installation straightforward.
The target is to do full secure communication. For that you have to make sure TLS is used to connect to Kamailio server.
First time when you start Jitsi, a window like next one appears.
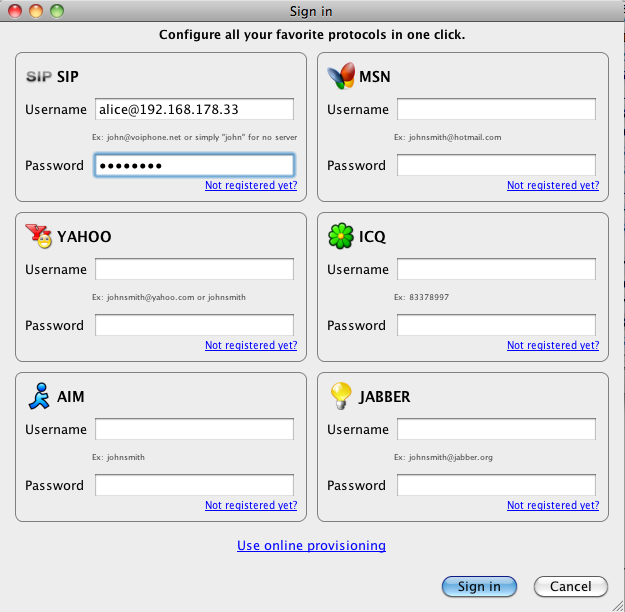
You can enter username@yourip or username@yourdomain and the appropriate password in the upper-left form (note: Jitisi is a multiprotocol application, in this case we use SIP capability). The screenshot is taken for user alice.
After that, main window should appear. Next is to update the setting in order to use TLS.
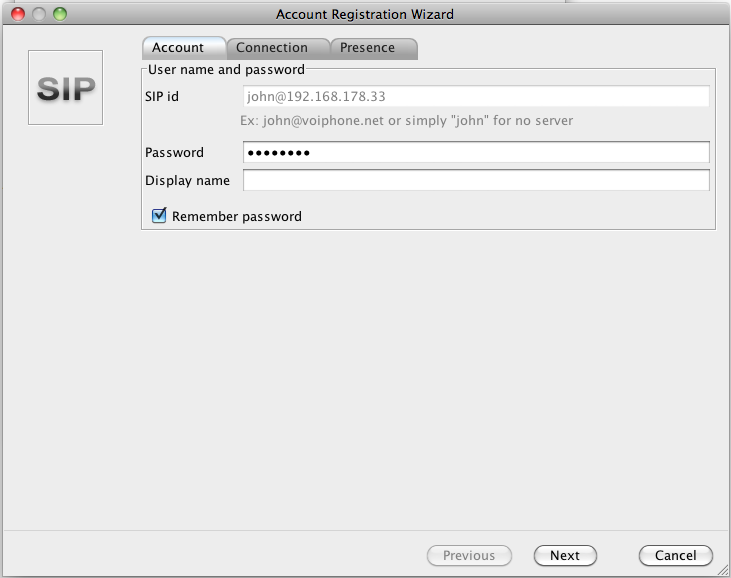
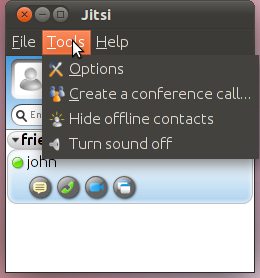
Got to menu Tools⇒Options on Linux or Jitsi⇒Preferences on Mac OS X. Then edit the SIP account (screenshot taken for user john), and go to Connection tab:
You have to fill in the proxy details (uncheck first “Configure proxy automatically” option), with ip address, port and transport TLS. Note that the port is 5061 for secure communication over TLS.

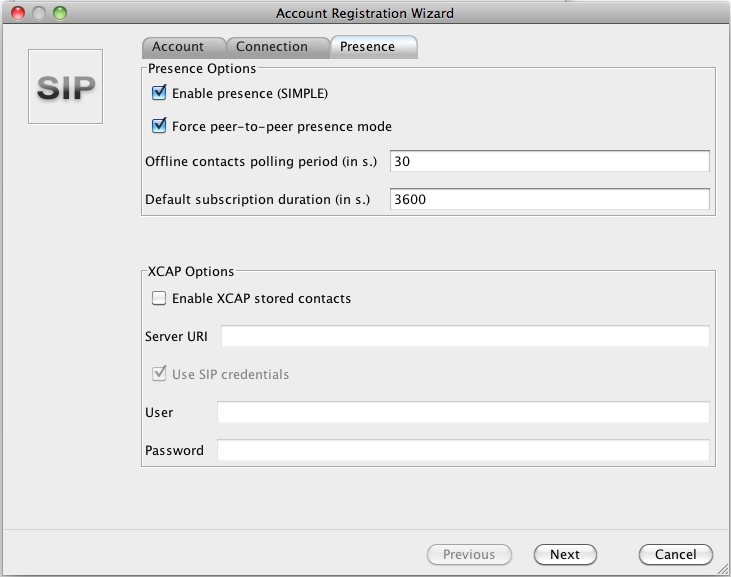
Skype does end-to-end presence model, so we have to enable that as well in Presence tab.
Once done, click “Next” and you will see a summary of settings, click “Sign in” and Jitsi will register with Kamailio server. First time you may see a dialog box regarding the TLS certificate (because it was self generated and signed).
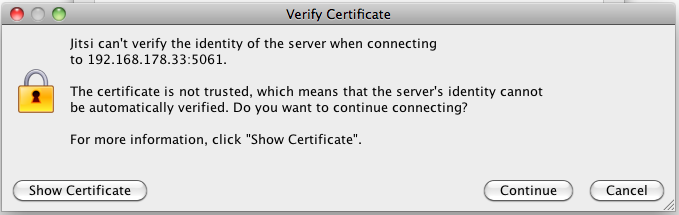
Click “Continue” and you should see again the main window.
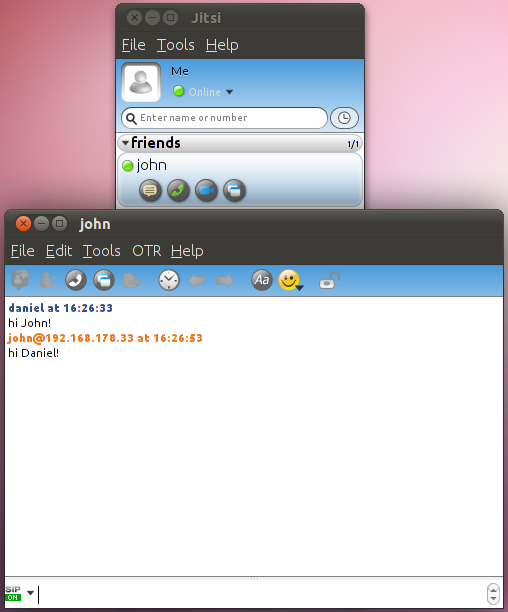
Contacts can be added via menu File ⇒ Add contact or right click on main window panel. A green bullet on the left side of contact name will indicate that the respective contact is online.

Once you have some contacts added, then you can start easily real-time conversations with any of them - when you select a name in the contact list, you will see the icons to start instant messaging, audio or video calls, screen sharing.
One option to start a voice call is to select the contact and then click on the second icon (the green handset) displayed under the name.
Next screenshot shows the window displayed for an ongoing audio call.
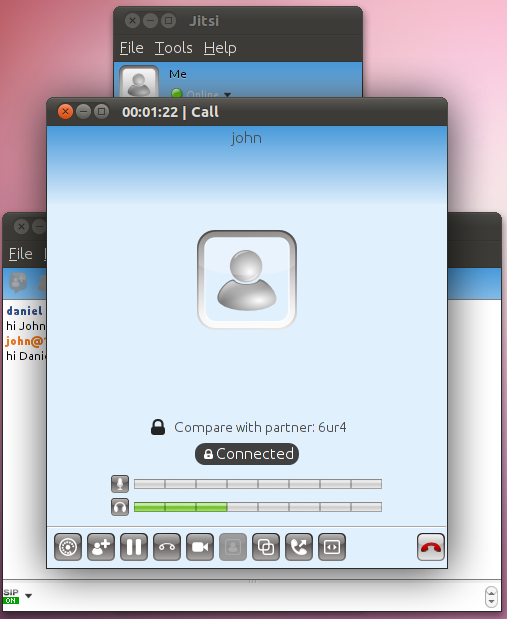
The lock is closed when the audio stream is encrypted - you can compare the encryption signature (in this case 6ur4) with your partner to be sure that there is nobody in the middle listening to your call - if your partner sees a different signature then the conversation is 'taped'.
The horizontal bars show in green the audio level of the person speaking.
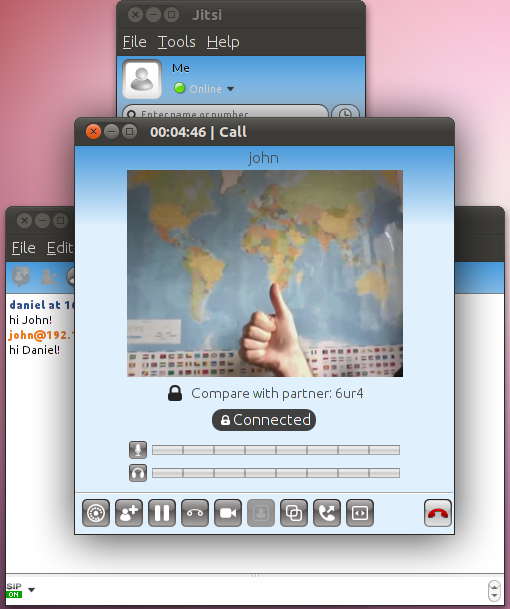
Video calls can be started by pressing the video camera button displayed under the contact name. It can be one way video or two-ways video communication when both parties have a web camera connected to their computer running Jitsi.
Next screenshot presents the instant messaging window.
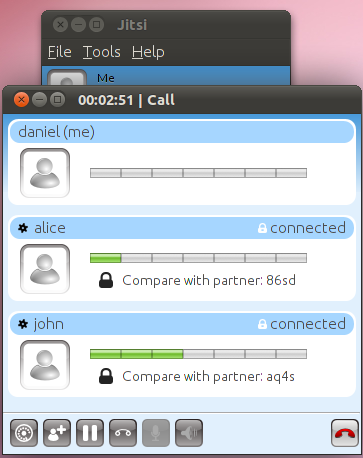
Starting a conference call is done from menu Tools⇒Create a conference call.
You get the dialog box with the options to invite people in the conference call.

Once you started, you see the audio levels of the participants in the call.
Skype is a trademark of Skype Limited or other related companies.